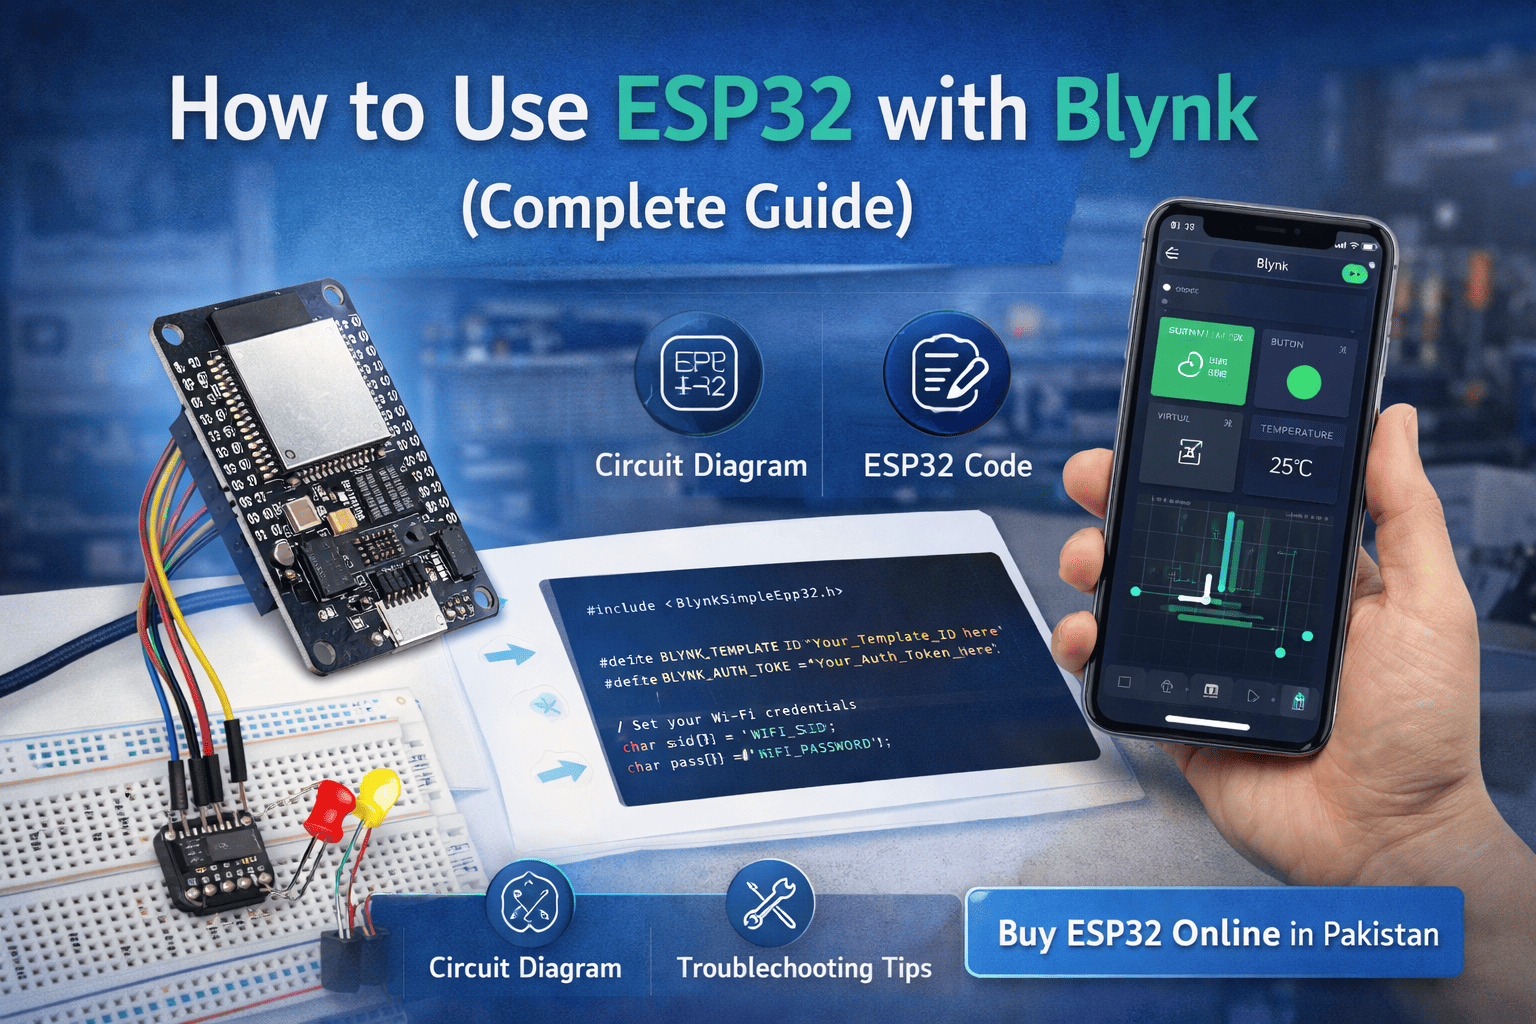
How to Use ESP32 with Blynk (Complete Guide)
If you want to build smart IoT projects, learning how to use ESP32 with Blynk is one of the best starting points. With the powerful ESP32 WiFi + Bluetooth microcontroller and the easy-to-use Blynk mobile app, you can control devices from anywhere in the world.
This step-by-step tutorial is specially written for students and beginners in Pakistan. By the end of this guide, you will be able to:
-
Connect ESP32 to Blynk
-
Control an LED from your phone
-
Upload and run working code
-
Troubleshoot common errors
Let’s begin.
Components Required
Before starting, gather the following components:
Hardware
-
LED (any color)
-
220Ω resistor
-
USB cable for ESP32
-
5V power supply (optional)
Software
-
Blynk IoT mobile app
-
Blynk account
-
WiFi connection
👉 Buy ESP32 Online in Pakistan
Internal links for your store:
-
ESP32 product page
-
Power supply page
-
Jumper wires page
Circuit Diagram
We will create a simple project: control an LED from the Blynk app using ESP32.
Wiring Connections
| ESP32 Pin | Component |
|---|---|
| GPIO 2 | LED positive |
| GND | LED negative (via resistor) |
Text-Based Circuit Diagram
ESP32 GND ——-> LED (-)
Steps:
-
Place LED on breadboard
-
Connect resistor to LED positive
-
Connect resistor to GPIO 2
-
Connect LED negative to GND
✅ Your hardware setup is complete.
Blynk App Setup
Before coding, configure the Blynk dashboard.
Step 1: Install Blynk
-
Download Blynk IoT from Play Store/App Store
-
Create an account
-
Log in
Step 2: Create Template
Inside Blynk Console:
-
Click New Template
-
Name: ESP32 LED Control
-
Hardware: ESP32
-
Connection: WiFi
-
Save
Step 3: Add Datastream
-
Create Virtual Pin V0
-
Data type: Integer
-
Save
Step 4: Create Device
-
Create device from template
-
Copy Auth Token
⚠️ Keep this token safe — you will use it in code.
ESP32 Code
Now open Arduino IDE and paste the following code.
Install Required Libraries
In Arduino IDE:
-
Go to Library Manager
-
Install:
-
Blynk
-
WiFi (already included for ESP32)
-
Complete Working Code
#define BLYNK_TEMPLATE_NAME “ESP32 LED Control”
#define BLYNK_AUTH_TOKEN “Your_Auth_Token”
#include <WiFi.h>
#include <BlynkSimpleEsp32.h>
char ssid[] = “YOUR_WIFI_NAME”;
char pass[] = “YOUR_WIFI_PASSWORD”;
int ledPin = 2;
BLYNK_WRITE(V0)
{
int value = param.asInt();
digitalWrite(ledPin, value);
}
void setup()
{
Serial.begin(115200);
pinMode(ledPin, OUTPUT);
Blynk.begin(BLYNK_AUTH_TOKEN, ssid, pass);
}
void loop()
{
Blynk.run();
}
Important Things to Edit
Before uploading, change:
-
Your_Template_ID
-
Your_Auth_Token
-
WiFi name
-
WiFi password
Uploading Code
Follow these steps carefully.
Step 1: Install ESP32 Board in Arduino IDE
-
Go to File → Preferences
-
Add this URL in Additional Boards Manager:
-
Go to Boards Manager
-
Install ESP32 by Espressif
Step 2: Select Board
-
Tools → Board → ESP32 Dev Module
-
Select correct COM port
Step 3: Upload
-
Connect ESP32 via USB
-
Click Upload
-
Wait for Done uploading
✅ Your ESP32 is now programmed.
Testing & Troubleshooting
Now let’s verify everything works.
Step 1: Open Serial Monitor
Set baud rate to 115200.
You should see:
-
Connecting to WiFi
-
Connected to Blynk
Step 2: Add Button Widget in Blynk
In Blynk mobile app:
-
Add Button widget
-
Set to Virtual Pin V0
-
Mode: Switch
Step 3: Test
-
Press button → LED ON
-
Release → LED OFF
🎉 Congratulations! Your ESP32 Blynk project is working.
Common Problems and Fixes
❌ ESP32 Not Connecting to WiFi
Fix:
-
Check SSID/password
-
Ensure 2.4 GHz WiFi
-
Move closer to router
❌ Blynk Device Offline
Fix:
-
Verify Auth Token
-
Check internet
-
Restart ESP32
❌ Upload Failed
Fix:
-
Hold BOOT button while uploading
-
Select correct COM port
-
Use good USB cable
❌ LED Not Turning On
Fix:
-
Check wiring
-
Verify GPIO pin in code
-
Check resistor connection
Pro Tips for Better Projects
If you want to build advanced IoT systems:
-
Use relay modules for appliances
-
Add sensors (DHT22, PIR, gas)
-
Use Blynk automation rules
-
Enable OTA updates
-
Add dashboard gauges
These upgrades make your FYP and hobby projects much more impressive.
FAQ Section
1. Is ESP32 better than ESP8266 for Blynk?
Yes. ESP32 has:
-
More GPIO pins
-
Bluetooth support
-
Dual-core processor
-
Better performance
2. Can I control multiple devices with one ESP32?
Yes. Just create more virtual pins (V1, V2, etc.) and widgets.
3. Does Blynk work without internet?
No. Blynk requires internet unless you host a local server.
4. What is the best power supply for ESP32?
Use:
-
USB power (easy)
-
Regulated 5V supply
-
Good quality adapter
5. Is this project suitable for FYP?
Yes. With added sensors and relays, it becomes a strong IoT final year project.
Final Words
Learning how to use ESP32 with Blynk opens the door to powerful IoT automation projects. With just a few components, you can control devices from anywhere in the world.
Start simple, then gradually build:
-
Smart home systems
-
Industrial monitoring
-
Energy management
-
AI-enabled automation
The ESP32 + Blynk combination is one of the most valuable skills for electrical and electronics students in 2026.
Shop IoT Components at Electroway
Get genuine ESP32 boards, sensors, power modules, and complete IoT kits delivered anywhere in Pakistan. Start building smarter projects today